- Print
- DarkLight
Understanding the Client Connector
Version Control provides a version control solution for folders and files located on a Windows file system. This functionality was designed specifically for providing Version Control capabilities for Framework Manager and Transformer projects.
Version Control is designed to work in tandem with the Integrated Client Versioning component of Integrated Control Suite. This tool provides version control for Framework Manager and Transformer projects in a distributed, managed and secured manner. Users can: add, check out, edit, check in, delete, and synchronize versions for projects as determined and managed by Integrated Client Versioning.
Version Control is a folder based system. In a more traditional source control system, individual files are checked out and checked in. These individual files have their own set of version numbers, which can cause challenges when versioning a Framework Manager project as many of the files have different version numbers. Instead of indicating a file to be versioned, with Version Control the user will select a folder. That folder, along with all the files and all subdirectories of that folder, are now treated as a single versioned artifact. Checking out the project will check out all of the files. Likewise, checking in the project will include all existing files and folders and new files and folders. Adding and deleting content, such as screenshots, notes and log files is now transparent to the user.
Choosing a Root Folder

Once on, select a location on the file system to be used as a Root Folder. The Root Folder is the location that all local copies of your Framework Manager or Transformer projects will be stored.
It is recommended that this location be an empty directory, unless you are planning on adding the contents to the source control system.

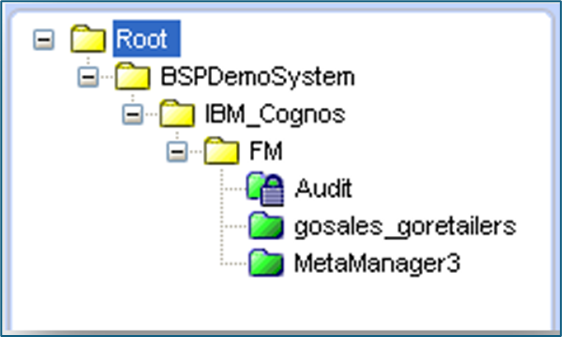
After selecting the Root Folder, any projects that you have been granted access to will be downloaded to that folder and will be visible in the tree.
Security
The user’s tree-based view of the project repository and capabilities will be dictated based on the security applied to folders and projects in the ICS Administration Console. Security can be applied using Accounts, Groups and Roles from any of the security namespaces.
The security can be applied at any level in the project hierarchy and can be inherited, similar to administering security in IBM Cognos Connection. Account access can be restricted to the ability to:
Read access, which determines if the user can see and sync the project in the ICS Client.
Write access, which determines if the user can check out and check in a project.
Add and Delete access to permit users to add and delete projects and folders. Note that deleting a folder will obliterate it from the database, whereas deleting a project will preserve the file history and only flag the project as deleted.
Viewing Projects and Revision History

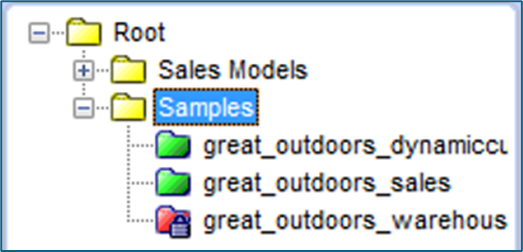
Projects are denoted in the tree by green folder icons. A folder with a lock icon indicates that the project has been locked. Other users will not be able to make modifications to a project while it is locked.
Clicking on a project will display its revision history in the grid. An asterisk denotes which version of the project the current user has in their root folder. The green “Download” icon allows the user to overwrite the version in their root folder with whichever version they choose. The blue “Revert” arrow allows users to revert to an older version of a model.

Context Menu Actions
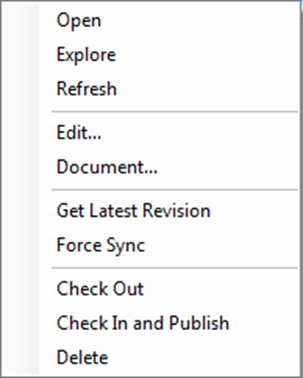
Right-Clicking on a Project in the tree provides the following capabilities:

Open: If a Framework Manager file is found within the Project folder, the file will be opened in Framework Manager. The same applies to Transformer files. Otherwise the user will be prompted for which file should be opened. The file is opened in the application associated with that extension in Windows.
Explore: Opens the Project directory in Windows Explorer.
Refresh: Synchronizes the tree to view the most recent Projects and Project information.
Get Latest Revision: Replaces the files within the specified project folder with the most recent version from the server.
Force Sync: Deletes the current files in the project folder and replaces them with the most recent version from the server.
Check Out: Locks a project for editing. Other users will not be able to make changes to the project while checked out by another user.
Undo Check Out: This will not check in any changes made to the model and unlock the model. Any changes made to the model will be lost.
Check In: Creates a new version of the model and saves it to the ICS database. Users will be prompted to add comments when selecting this option.
Check in and Publish: This option checks in the model and also prompts the user to publish the model to Cognos Connection. Users will still be prompted to add comments with the check in.
Delete: Deletes the project from the user’s root folder and the server’s repository. If a project is being deleted it will be marked deleted on the server (preserving revision history).
Deleted Items Backups
If desired, backups of deleted items will be automatically saved to a zip archive by Version Control so they can be recovered if desired. This option can be enabled in the “General” tab of the Tools >> Options menu. The user can specify the location of the backups, and also the length of time that the backups will be retained before they are automatically deleted from the client. Note, we recommend enabling this feature to shield from accidental deletions, etc.

Checked In Archives
Version Control has an archiving safeguard in place to guard against lost work if problems arise while communicating with the server. Every time a user checks in a project, a zip archive of the Project will be saved to a folder called “checked in archives” which will be located in the directory specified in the “Local Backups” section of the Options menu (see Deleted Item Backups above).


