- Print
- DarkLight
Installation Overview
The ICS Installation is comprised of three separate parts:
ICS Server Installer
ICS Plugin Installer
ICS Extension Installz
The ICS Server Installer will install the ICS application comprised of a .NET Core service that hosts its own webserver. This installation should be performed on a server that is accessible to the IBM Cognos Analytics servers and may be installed on an IBM Cognos Analytics server if desired. The IBM Cognos Analytics environment should be running during the ICS Server installation.
The ICS Plugin Installer will install integration components into the IBM Cognos Analytics installation. This installer should be performed on each IBM Cognos Analytics Content Manager Server. The IBM Cognos Analytics environment should be stopped during the ICS Plugin installation.
Note: The plugin install is used to create and manage a filter file in the IBM Cognos Analytics environment. The filter is still required in the IBM Cognos Analytics environment so that the instance knows that ICS has been integrated and is running. Future ICS Plugin upgrades are not required unless noted in the Hotfix guide and check all versions up to the current installed version for upgrades.
The ICS Extension package is uploaded into the IBM Cognos Analytics environment and serves as the gateway components for the ICS integration. (Manage > Customization > Extensions)
See the relevant area below for either a Windows installation or a Unix installation.
Windows Installation ICS Server – New Installation
To begin the ICS Server installation, download the ICS Automatic Installer package and extract the ICS_Service.msi. Execute this installer and allow the process to run with elevated administrative capabilities. Before running the ICS Server, installation be sure the IBM Cognos Analytics service is running.
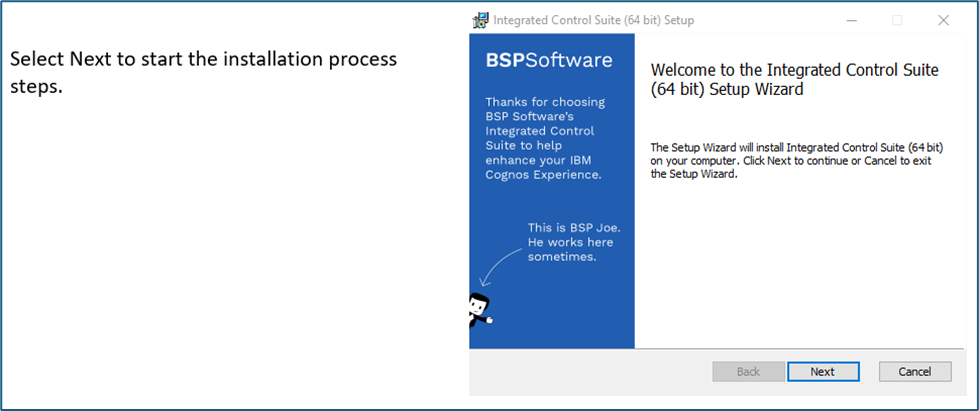
Step 1. Click the “Next” button.
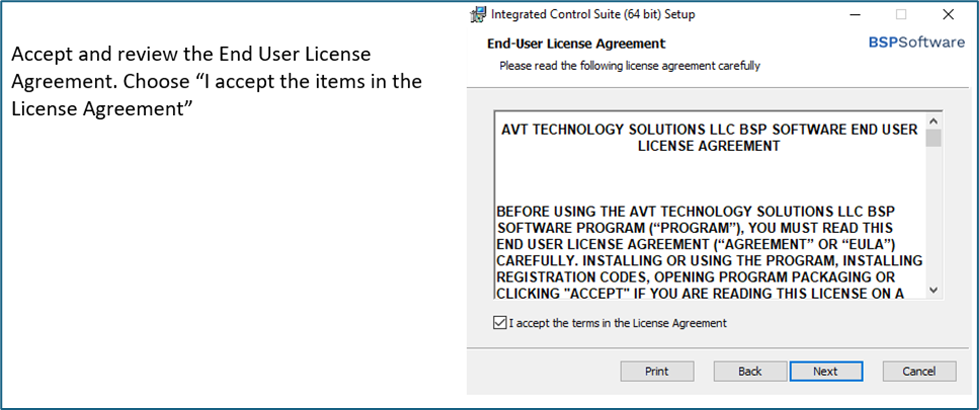
Step 2. Accept License Agreement.
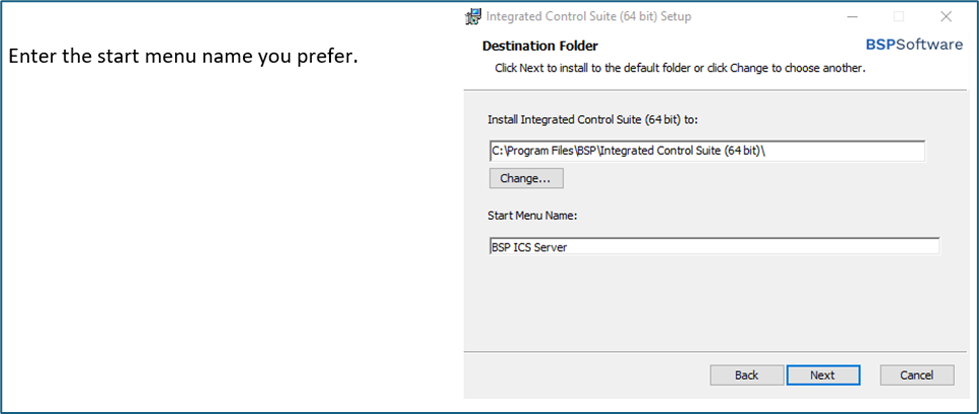
Step 3. Select an installation directory to install the Integrated Control Suite™ server components.
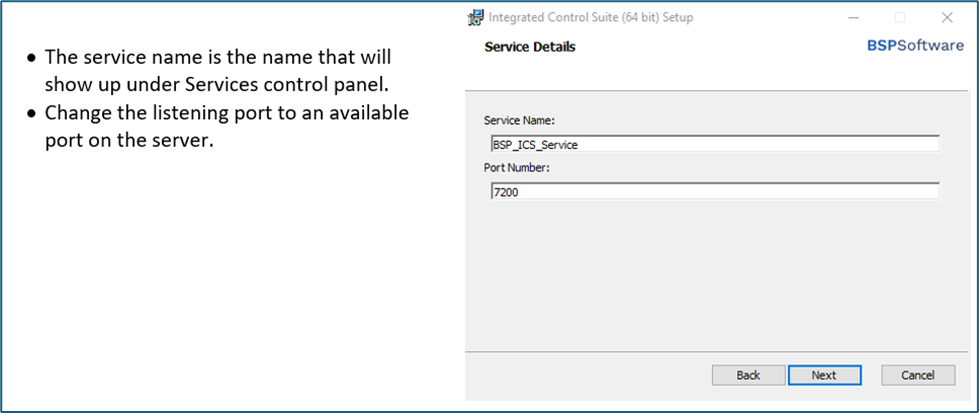
Step 4. Enter your preferred service name and port number.
Step 5. Installation
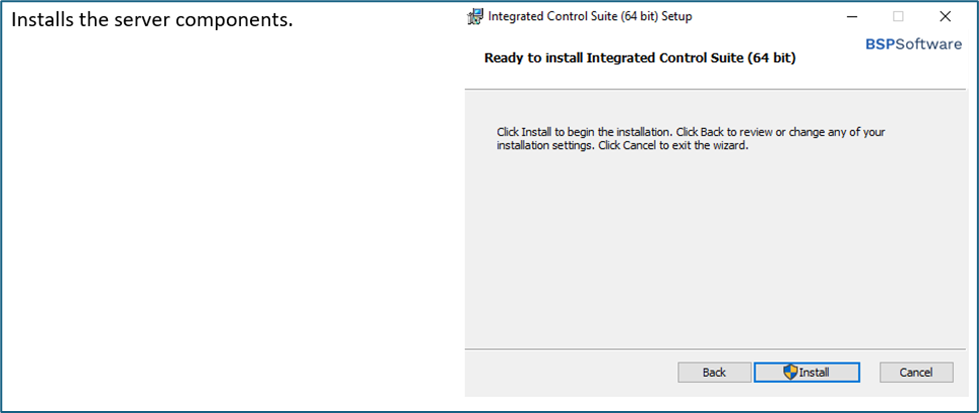
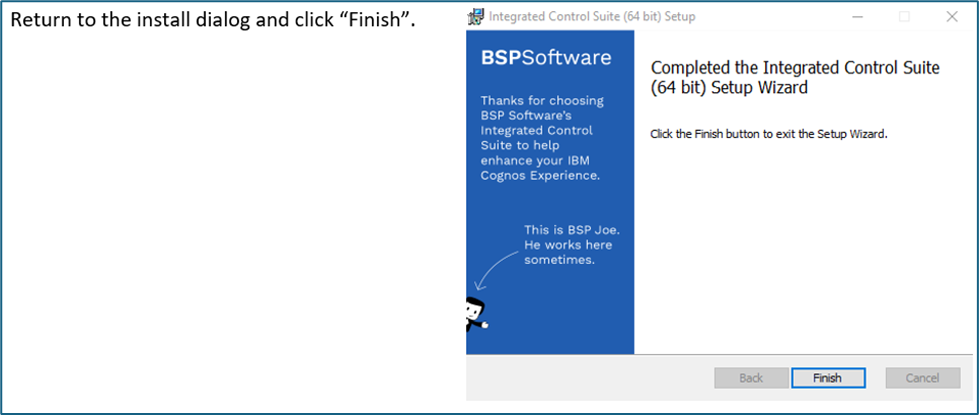
Step 6. Finish Setup
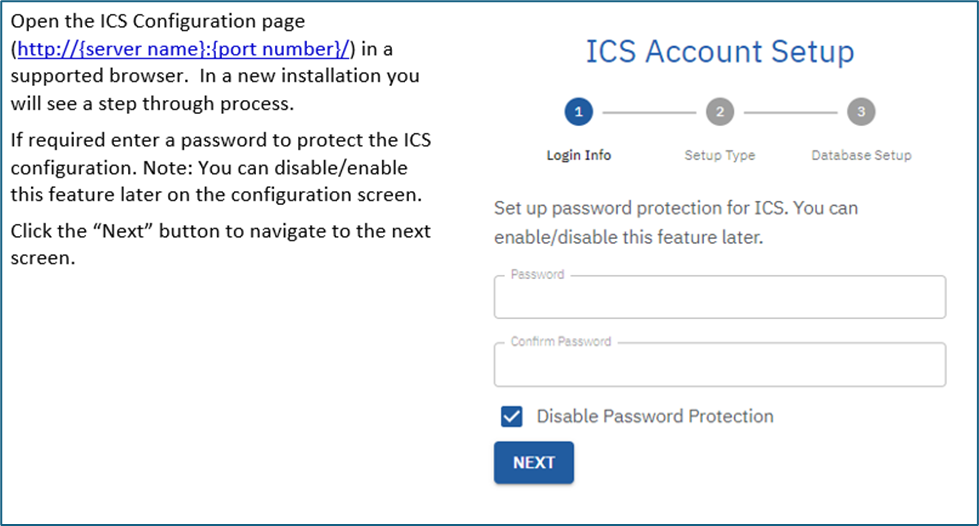
Step 7a. ICS Account Setup
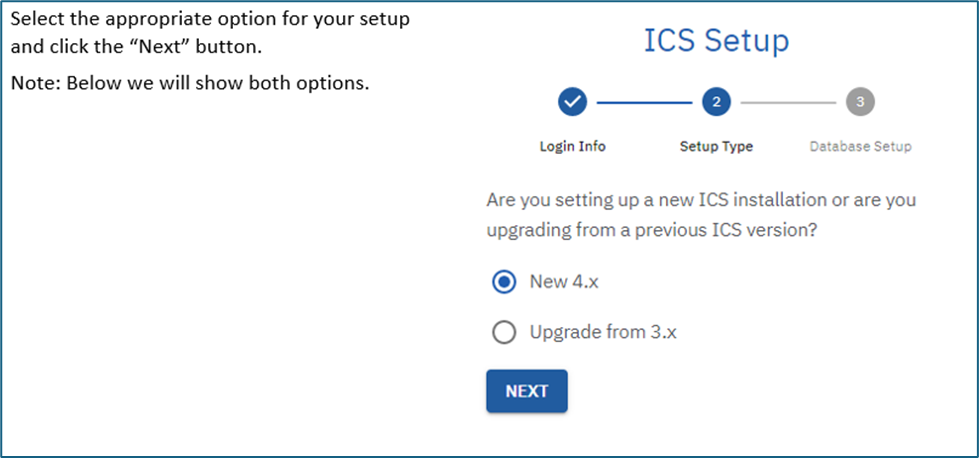
Step 7b. ICS Setup
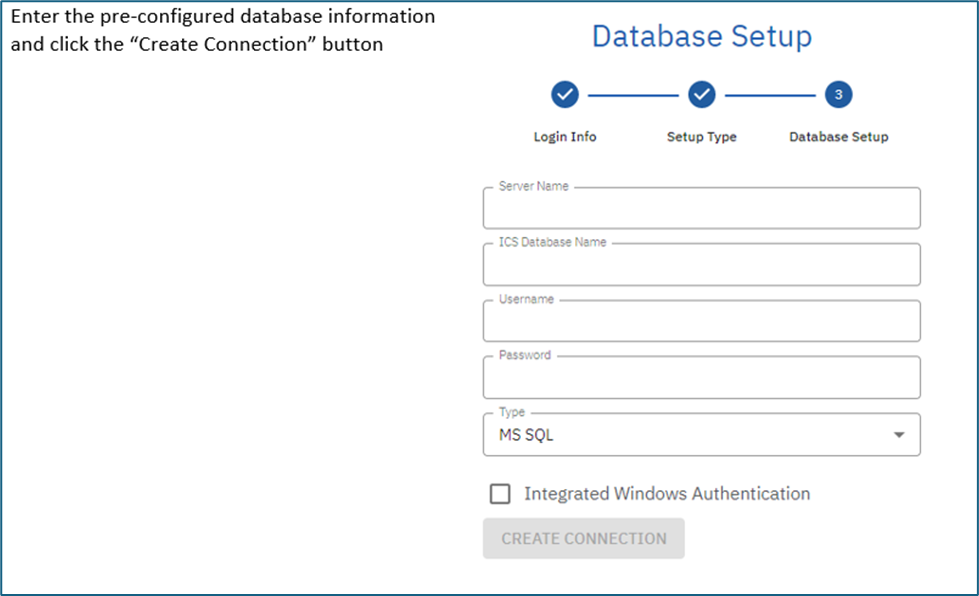
Step 8a. New 4.x Database Setup
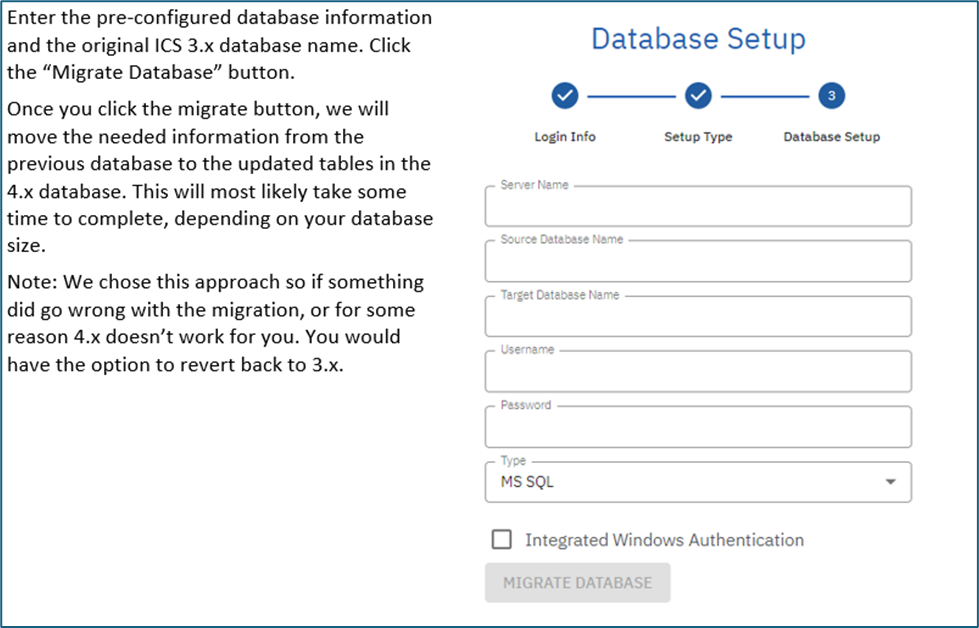
Step 8b. Upgrade 3.x Database Setup
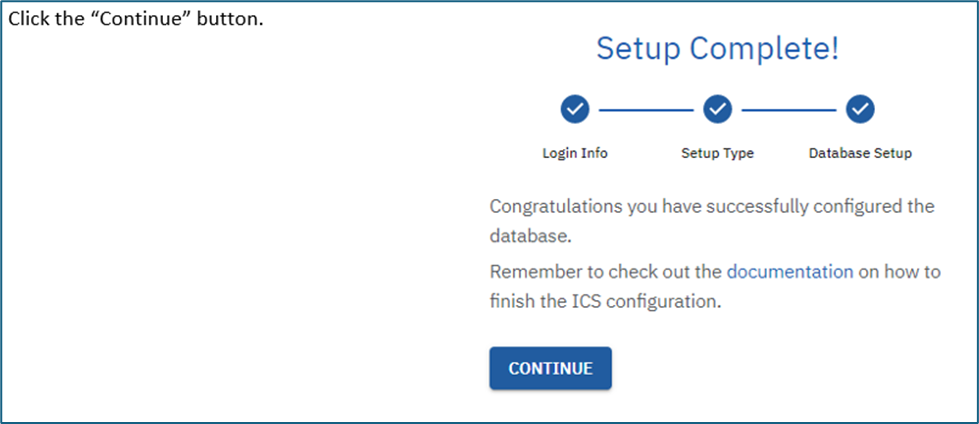
Step 9. Setup Complete
Step 10. Adding Cognos Environments
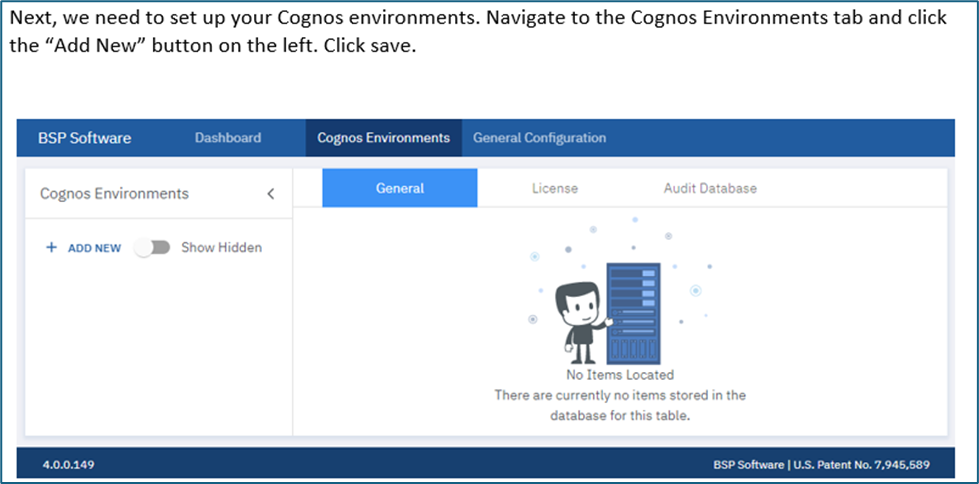
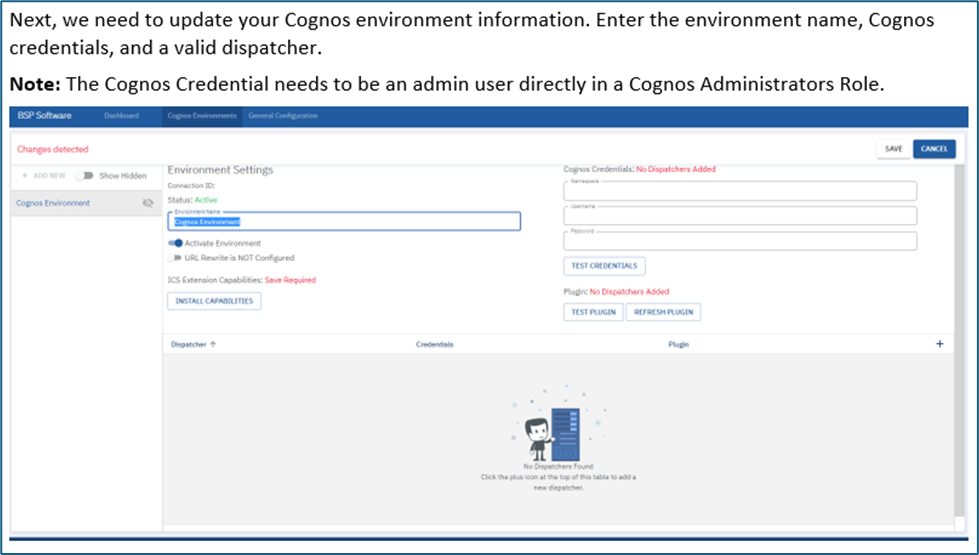
Step 11. Setup Cognos Environments
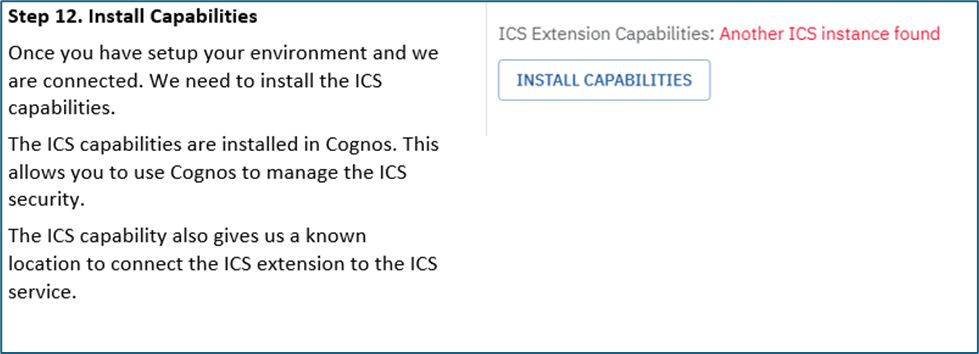
Step 12. Install Capabilities
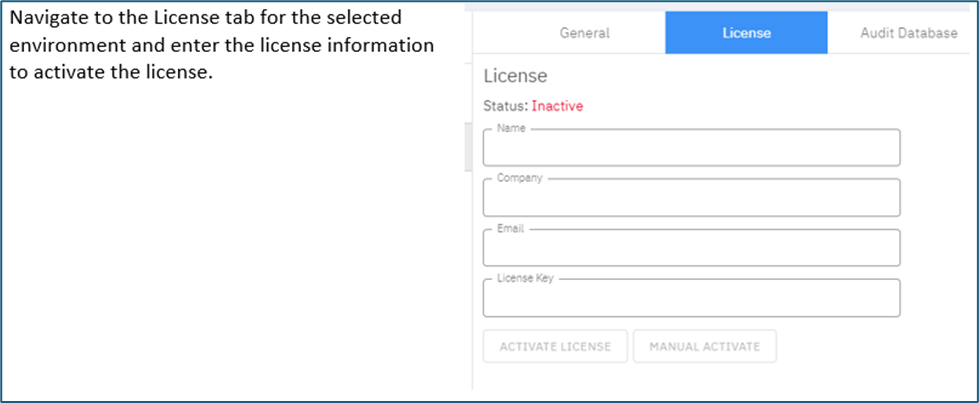
Step 13. License
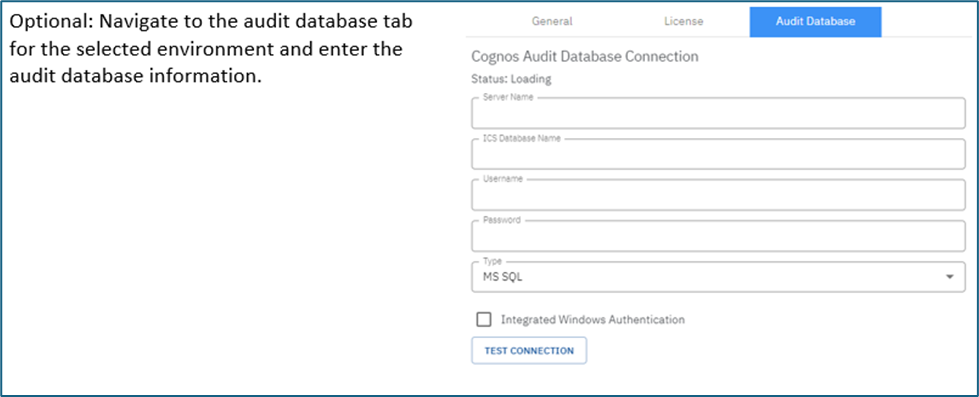
Step 14. Audit Database
ICS Plugin – New Installation
To begin the ICS Plugin installation, download the ICS Automatic Installer package and extract the ICSPlugin_windows.exe. Execute this installer and allow the process to run with elevated administrative capabilities. This installer should be run on every installation of an IBM Cognos Analytics Content Manager. Before running this installation be sure the IBM Cognos Analytics Service is stopped, and the ICS Service has already been installed.
Step 1. Accept the license agreement
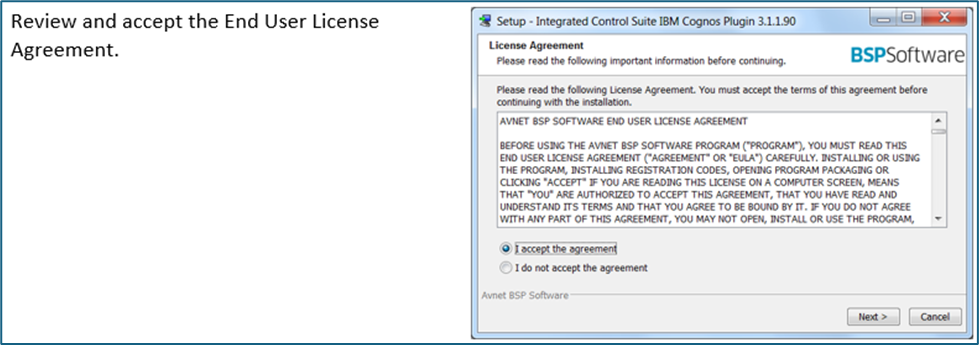
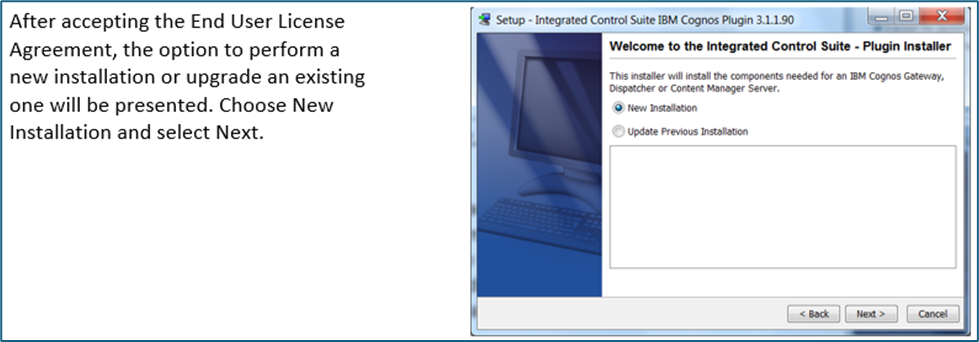
Step 2. Choose the installation type.
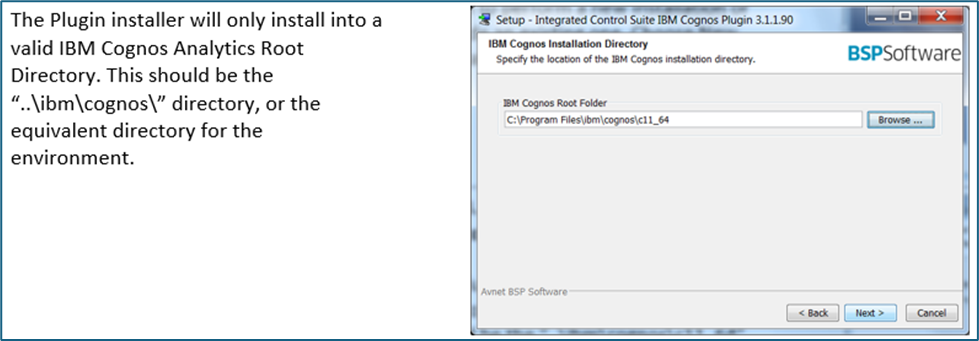
Step 3. Choose an IBM Cognos Analytics Root Directory to install into.
Step 4. Select the Start Menu Folder

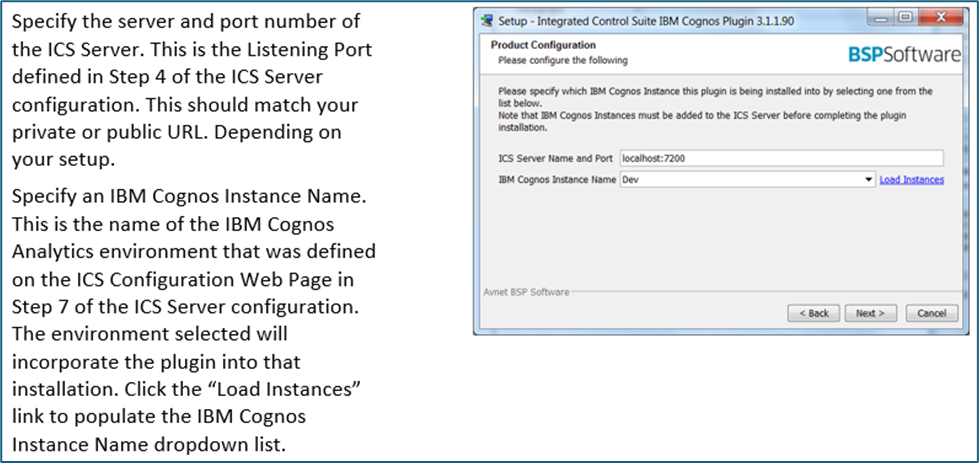
Step 5. Specify the Configuration Settings
Step 6. Review the Installation
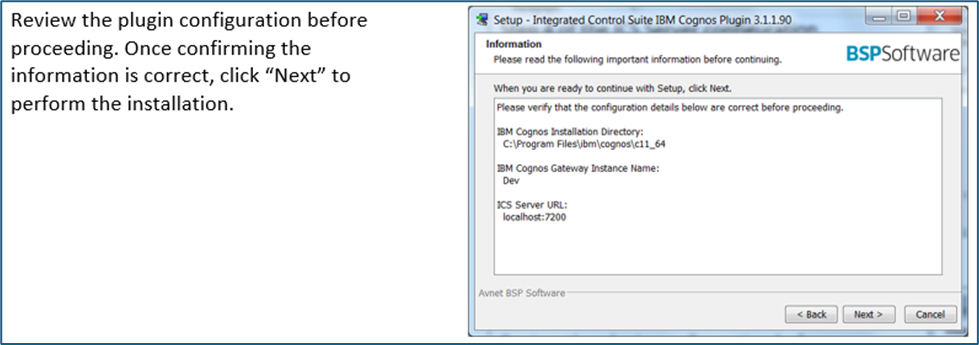
Step 7. After the installation is complete, Click “Finish”.

Step 8. Restart IBM Cognos and navigate back to (http://{server name}:{port number}/) and verify the plugin is connected.

IIS Setup – New Installation (If required)
This guide was written and based off the Cognos Guide below: https://www.ibm.com/support/knowledgecenter/SSEP7J_11.0.0/com.ibm.swg.ba.cognos.inst_cr_winux.doc/t_gateway_iis.html#t_sso_actdirserver
If this is not required skip to the next section. Apache setup can be found in Appendix A.
The setup for IIS requires an additional rewrite rule for the ICS Service, similar to the mapping for the BI folder in IBM Cognos (For example - C:\Program Files\ibm\cognos\analytics\webcontent\bi)
Step 1. Navigate to the Cognos installation directory “webcontent” folder for each Cognos Gateway based on your IIS setup. Add the “icsService” folder. Note: This is used in IIS to create a URL rewrite rule later.

Step 2. Navigate to the IIS. Select the icsService folder we just added to the windows directory.
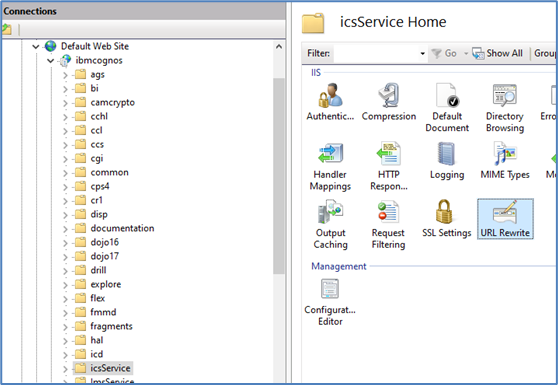
Step 3. With the icsService folder selected open the URL Rewrite located on the right-hand side of IIS.
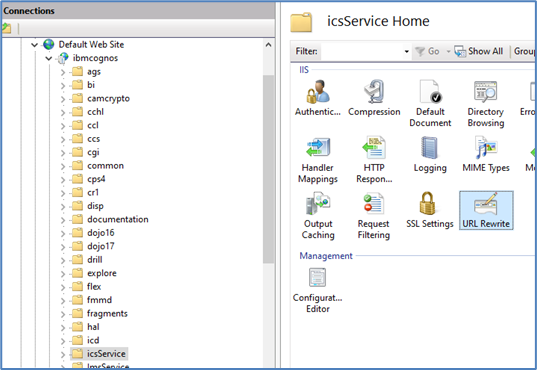
Step 3. Click the Add Rule(s) on the upper right-hand side.

Step 4. Select Reverse Proxy and select the OK button.
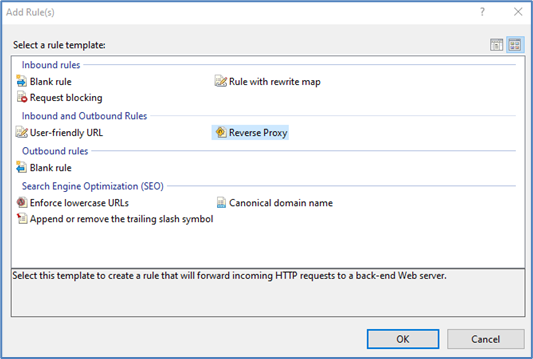
Step 5. Enter the server’s name or the IP address of where the ICS service is installed with the port number. Click the “OK” button.
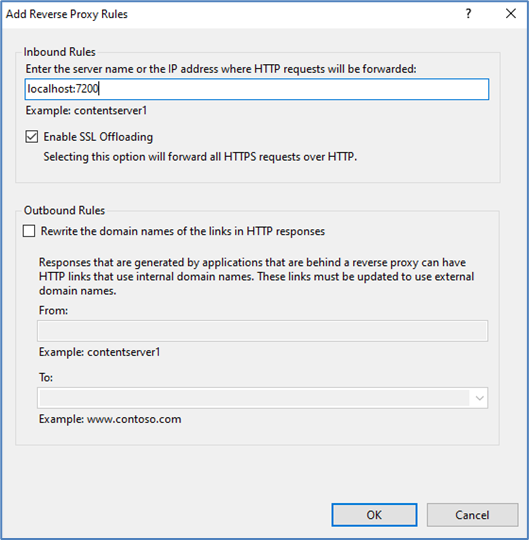
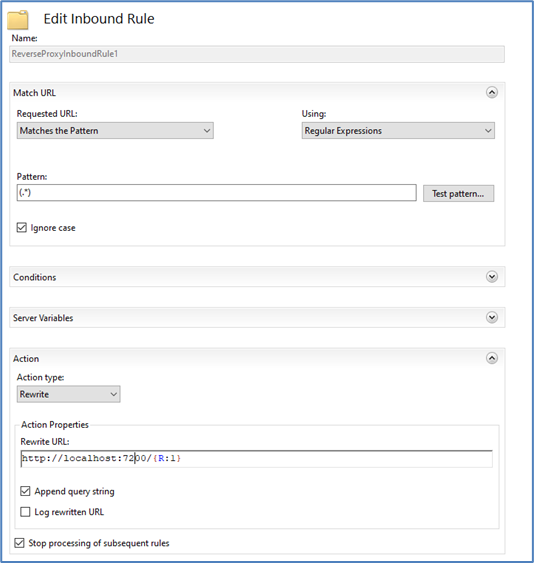
Step 6. Open the new rule and ensure the rewrite URL is correct for your setup. Note: Ensure the rewrite URL matches the name of the ICS Service private URL or public URL. This depends on your setup.
Step 7. Navigate back to the ICS server configuration. Open the Cognos Environments General Tab. Turn on the URL Rewrite. Save changes.
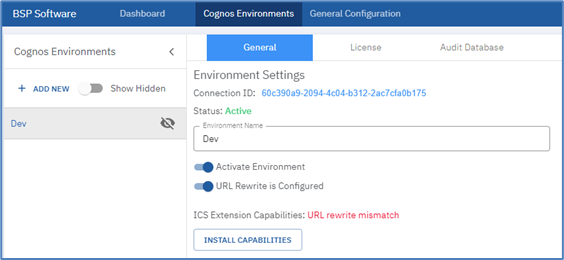
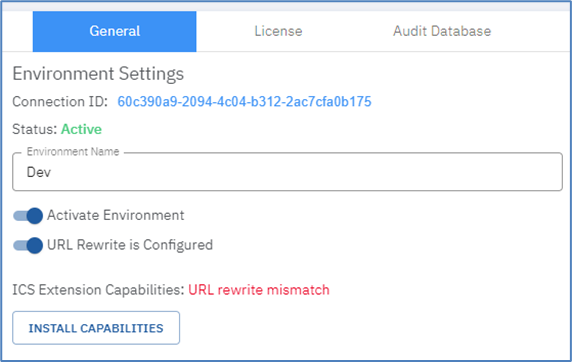
Step 8. Navigate to the Cognos Environments tab. Click the “Install Capabilities” button.
Step 9. Next, we need to test to ensure the URL rewrite is working properly. Navigate to the public facing Cognos gateway we updated in the IIS setup. Append “icsService/api/Connections/GetAllConnections” onto the URL.
http://{server name}/{IIS Alias}/icsService/api/Connections/GetAllConnections
Navigate to the server where ICS is installed and enter:
http://{server name}:{port number}/api/Connections/GetAllConnections
If the data is the same, congratulations you successfully setup the ICS IIS redirect rule.
ICS Extension – New Installation
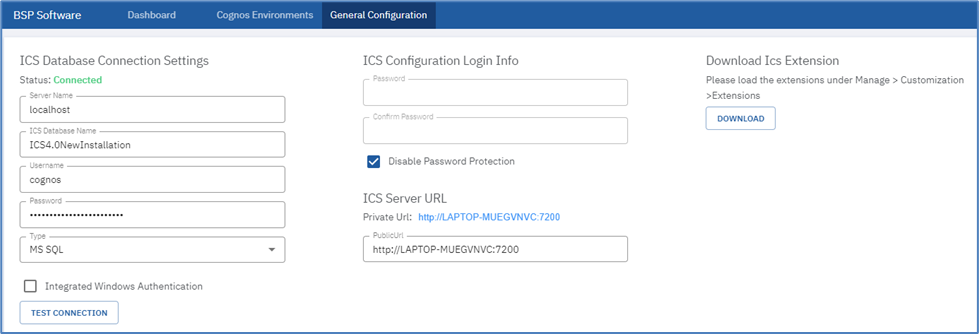
To begin the ICS Extension installation, download the ICS Extension zip file from the ICS Configuration Page (http://{server name}:{port number}/), by selecting the General Configuration tab at the top of the page, and then selecting the Download link. Then locate the file to a stored location.
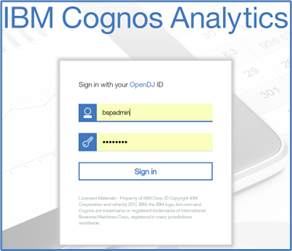
Step 1. Log in Log in to the IBM Cognos Analytics Server.
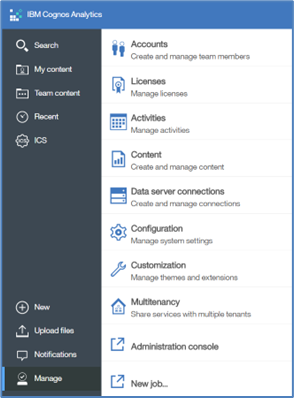
Step 2. Open Customization Select Customization from the Manage slide-out.
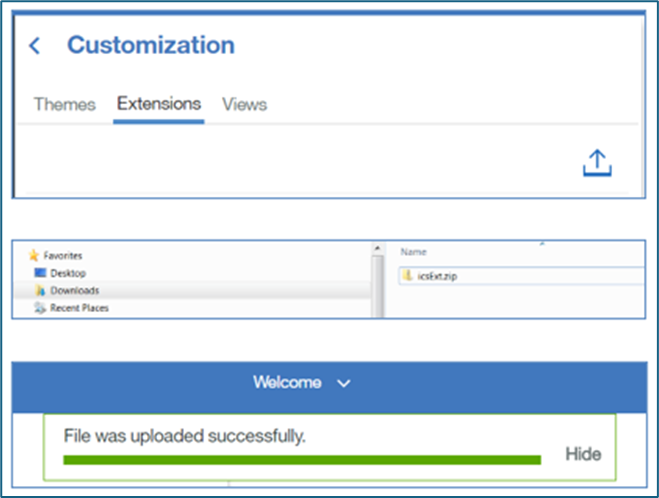
Step 3. Upload the Extension Select the Extensions tab, then the Update link. Navigate the location of the stored extension zip file, and then push the Open button.
ICS Plugin – Disabling/Enabling the IBM Cognos Analytics Integrations
The Integrated Control Suite™ Automatic Installer provides start menu items for Disabling and Enabling (Reinstalling) the Plugin Integration. This process can be used to temporarily remove or reapply the ICS integrations located in the IBM Cognos Analytics Files. Performing this action will not uninstall the ICS files or remove the configuration information, it will only update the ICS modifications to the IBM Cognos Analytics files. This is useful in case it becomes necessary to disable ICS while requesting support from IBM Cognos Analytics, or as a debugging tool when trying to prove or disprove that an issue is being caused by the ICS installation. In addition, the Re-install process can be used to reapply the ICS Integration after installing an IBM Cognos Analytics Update or Fix Pack. Be sure the IBM Cognos Analytics Service is stopped when running this process.
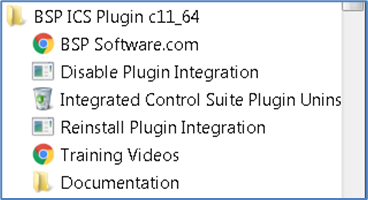
NOTE: If doing a complete uninstall and reinstall during an upgrade it is best to reboot the machine after the uninstall and reinstall.
Cognos Upgrade
When upgrading Cognos to a new version or Fix Pack and ICS is already installed, follow these steps prior to upgrading Cognos:
Uninstall the ICS Plugin (steps above on page 23) in the ICS Plugin section
Install/upgrade Cognos
Re-install the ICS Plugin
Start Cognos
Unix Installation
For assistance with a Unix installation, please contact BSP Software Support at support@bspsoftware.com

